Red Velvet Cheesecake Cupcake – A Festive, Creamy Treat
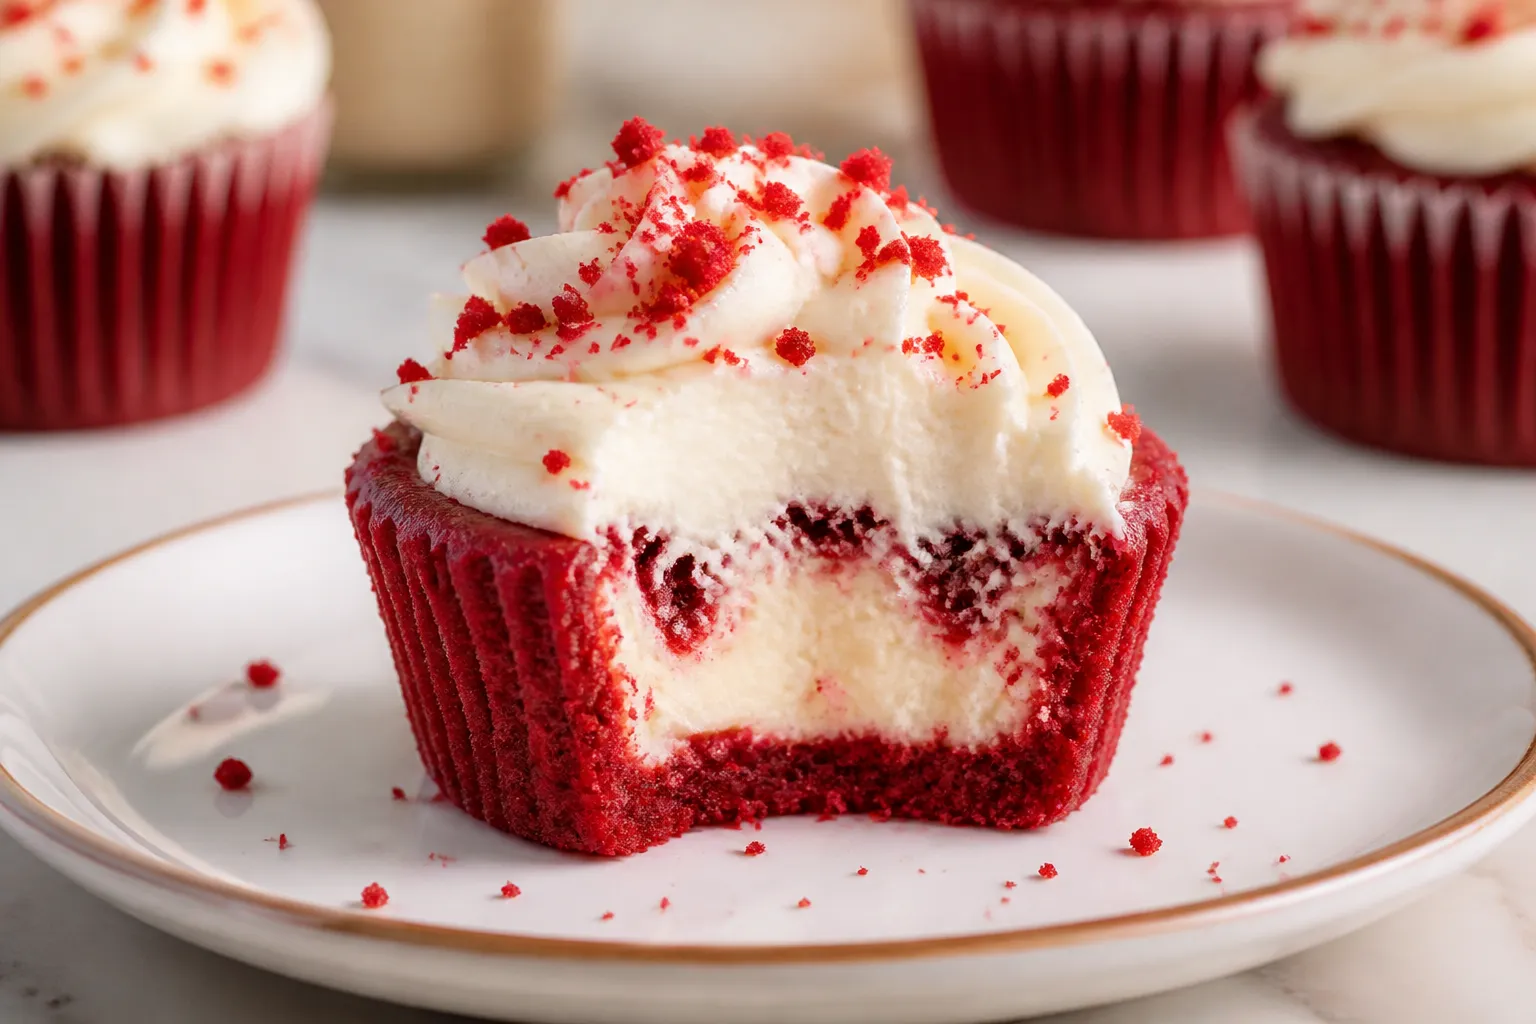
These red velvet cheesecake cupcakes check all the boxes: rich cocoa flavor, a hint of tang, and a creamy cheesecake center that melts into the crumb. They’re pretty enough for a party but simple enough for a weekday bake. If you love red velvet cake and cheesecake, this is the sweet spot where both meet.
The texture is soft and moist, with that signature red hue and a touch of vanilla. Make a batch to impress guests or stash them in the fridge for a treat that keeps well.
What Makes This Recipe So Good

- Two desserts in one: A tender red velvet cupcake wrapped around a silky cheesecake core feels special without a lot of fuss.
- Balanced flavor: Cocoa, vanilla, and buttermilk create depth, while the cheesecake brings a cool, creamy contrast.
- Moist and reliable: Oil and buttermilk keep the crumb soft for days, so they won’t dry out overnight.
- Great for make-ahead: These cupcakes taste even better chilled, making them perfect for parties and gifting.
- Easy to decorate: Serve as-is, dust with powdered sugar, or add cream cheese frosting for a bakery-style finish.
Shopping List
- For the Red Velvet Cupcakes:
- All-purpose flour
- Granulated sugar
- Unsweetened cocoa powder (natural)
- Baking soda
- Fine salt
- Buttermilk (or milk + vinegar/lemon juice)
- Neutral oil (vegetable or canola)
- Large eggs
- Vanilla extract
- White vinegar
- Red gel or liquid food coloring
- For the Cheesecake Filling:
- Cream cheese, softened
- Granulated sugar
- Vanilla extract
- Large egg yolk
- Pinch of salt
- Optional Topping:
- Cream cheese frosting or whipped cream
- Powdered sugar for dusting
- Chocolate shavings or red sanding sugar
Step-by-Step Instructions

- Prep the pan and oven: Line a 12-cup muffin tin with paper liners. Preheat oven to 350°F (175°C).
Bring cream cheese to room temp so it blends smoothly.
- Make the cheesecake filling: In a bowl, beat cream cheese until creamy. Add sugar, vanilla, egg yolk, and a pinch of salt. Mix until smooth.
Set aside. The mixture should be thick but spoonable.
- Combine dry ingredients: In a large bowl, whisk flour, sugar, cocoa, baking soda, and salt until no streaks remain.
- Combine wet ingredients: In a separate bowl, whisk buttermilk, oil, eggs, vanilla, vinegar, and red food coloring. Start with 1–2 teaspoons gel or 1–2 tablespoons liquid coloring and adjust for a deep red.
- Make the batter: Pour wet ingredients into dry.
Stir gently with a spatula until just combined. Do not overmix; a few small lumps are fine.
- Fill the liners: Add about 1 heaping tablespoon of red velvet batter to each liner. Spoon about 1 tablespoon of cheesecake filling into the center.
Top with another tablespoon of batter to cover. Each cup should be around 2/3 to 3/4 full.
- Bake: Bake 18–22 minutes, until the cupcake tops spring back and a toothpick inserted near the edge (not the cheesecake center) comes out clean. The centers may look slightly soft—this is okay.
- Cool: Let cupcakes cool in the pan for 5 minutes, then transfer to a rack.
Cool to room temperature before chilling. The cheesecake sets fully as it cools.
- Chill and finish: Refrigerate for at least 1 hour for best texture. Frost with cream cheese frosting, pipe a swirl of whipped cream, or dust with powdered sugar.
How to Store
- Refrigerate: Store cupcakes in an airtight container in the fridge for up to 5 days.
Chilling improves the cheesecake texture.
- Freeze: Freeze unfrosted cupcakes for up to 2 months. Wrap each in plastic, then place in a freezer bag. Thaw overnight in the fridge.
- Frosting note: If using cream cheese frosting, keep refrigerated.
Add decorations just before serving to prevent color bleed.
Health Benefits
- Portion control: Cupcakes offer built-in serving sizes, making it easier to enjoy dessert mindfully.
- Protein and calcium: The cheesecake center provides a small boost from dairy, including protein and calcium.
- Lower saturated fat option: Using oil instead of butter in the cake reduces saturated fat while keeping moisture.
- Mindful ingredients: You can reduce sugar slightly, use Neufchâtel (lower-fat cream cheese), or opt for a light whipped topping to tailor the treat.
Pitfalls to Watch Out For
- Overmixing the batter: This can make cupcakes dense. Stir until just combined after adding the wet ingredients.
- Cold cream cheese: It leads to lumpy filling. Ensure it’s fully softened before mixing.
- Overbaking: The cheesecake center should remain creamy.
Check at 18 minutes and avoid waiting for a dry toothpick in the middle.
- Skimping on color: Cocoa can dull the red. Use enough gel color for a vibrant hue, or your cupcakes may bake up brownish.
- Uneven layers: If you add too much filling or too little top batter, the cheesecake may peek out or sink. Aim for a batter-filling-batter sandwich.
Alternatives
- Color variations: Try deep pink or burgundy gel instead of classic red.
For a natural option, use beet powder, though the color will be softer.
- Flavor twists: Add orange zest to the cheesecake, or a teaspoon of espresso powder to the cupcake batter for depth.
- Gluten-free: Use a 1:1 gluten-free all-purpose flour blend. Let the batter rest 10 minutes before baking to hydrate the flours.
- Lighter cheesecake: Swap in Neufchâtel or a mix of Greek yogurt and cream cheese for a tangier, lighter center.
- Frosting choices: Classic cream cheese frosting, mascarpone whipped cream, or a simple vanilla buttercream all work well.
- Add-ins: Fold mini chocolate chips into the cheesecake filling or sprinkle chopped pecans over the frosted tops.
FAQ
Can I make these without food coloring?
Yes. The cupcakes will still taste like red velvet thanks to cocoa, vanilla, and buttermilk.
They’ll bake up a natural cocoa color. If you want a mild tint, try beet powder, though it won’t be as vibrant.
Do I have to use buttermilk?
Buttermilk adds tang and tenderness. If you don’t have it, make a quick substitute: mix 1 cup milk with 1 tablespoon white vinegar or lemon juice, stir, and let sit for 5 minutes before using.
Why did my cheesecake center sink?
A slight dip is normal because the filling is creamy.
Deep sinking can mean too much filling, underbaked edges, or opening the oven too early. Measure filling carefully and bake until the cupcake edges set.
Can I bake these as mini cupcakes?
You can. Use mini liners, add a small dollop of filling, and reduce bake time to about 10–12 minutes.
Keep a close eye, as minis can overbake quickly.
What frosting pairs best?
Classic cream cheese frosting is the go-to. If you want something lighter, try stabilized whipped cream or mascarpone whipped cream. A light dusting of powdered sugar also looks elegant.
How do I get that bright red color?
Use a high-quality red gel food coloring for the most intense shade without thinning the batter.
Start with 1–2 teaspoons and adjust to taste, keeping in mind cocoa will mute the hue slightly.
Can I make the batter ahead?
It’s better to bake right after mixing, as baking soda starts working once wet and dry ingredients combine. You can, however, make the cheesecake filling up to 2 days ahead and refrigerate it.
Final Thoughts
Red velvet cheesecake cupcakes deliver bakery-level charm with simple, reliable steps. The moist cocoa cake and creamy center feel indulgent, yet the process is straightforward for any home baker.
Make them a day ahead, chill well, and serve with a swirl of frosting or a dusting of sugar. They’re the kind of dessert that looks festive, tastes rich, and wins compliments every time.