5-Ingredient Raspberry Cheesecake Thumbprint Cookies – Soft, Buttery, and Bright
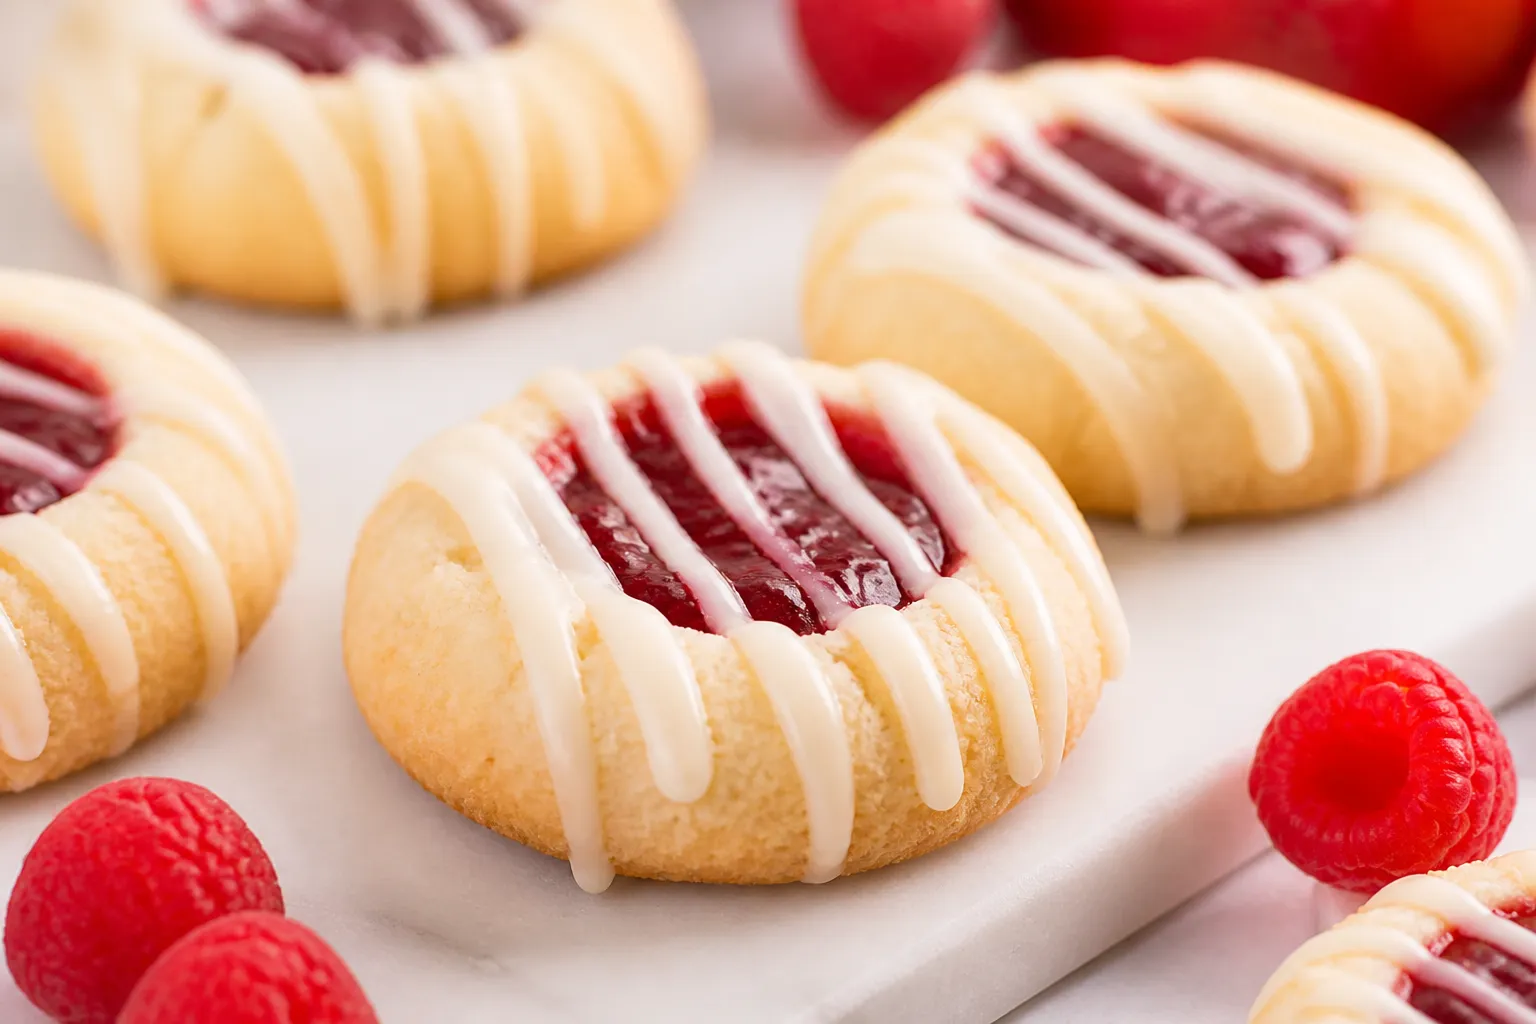
These cookies bring together the comfort of cheesecake and the charm of thumbprints in one easy treat. You only need five pantry staples, a bowl, and a baking sheet. The dough mixes in minutes and bakes into soft, tender cookies with a bright pop of raspberry in the center.
They feel special enough for holidays, but simple enough for a weekday sweet. If you like desserts that look pretty without fuss, this is your new go-to.
Why This Recipe Works
It relies on a classic combo: butter for richness and cream cheese for that cheesecake tang and a plush texture. Sugar sweetens and helps the cookies brown.
Flour brings it all together into a dough that holds a neat thumbprint well.
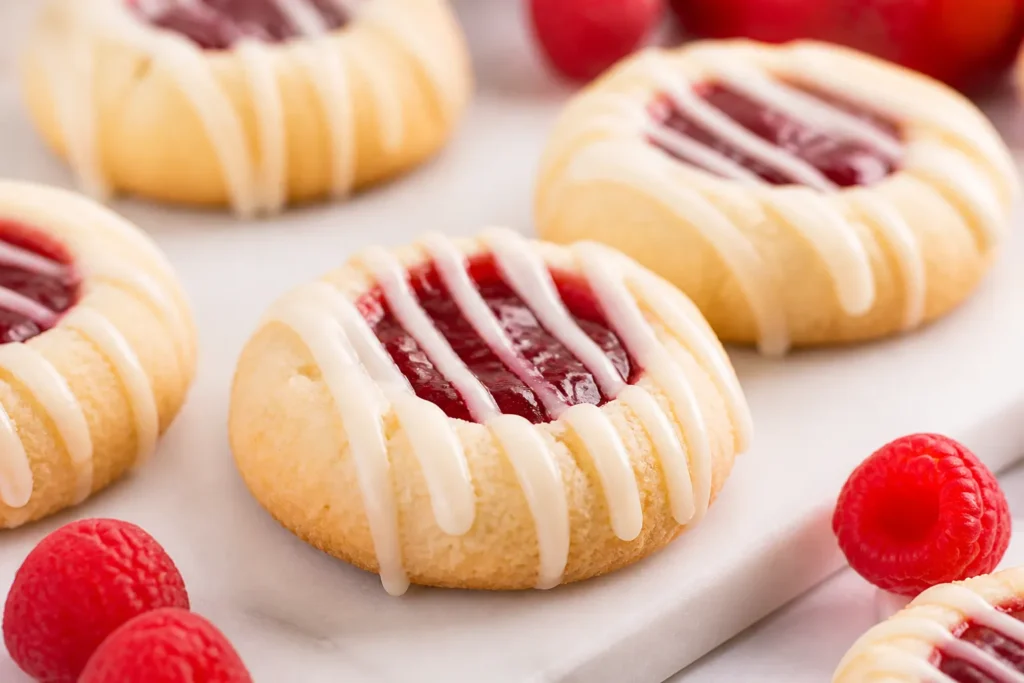
Chilling the dough keeps the cookies from spreading. Raspberry jam bakes into a jewel-like center that sets just enough to stay in place. With only five ingredients, each one earns its spot and pulls real weight.
What You’ll Need
- 1/2 cup (113 g) unsalted butter, softened – room temp so it creams smoothly.
- 4 oz (113 g) cream cheese, softened – full-fat gives the best texture and flavor.
- 1/2 cup (100 g) granulated sugar – for sweetness and light structure.
- 1 1/4 cups (160 g) all-purpose flour – measured correctly for the right tenderness.
- 1/3 to 1/2 cup raspberry jam or preserves – seedless if you prefer a smooth bite.
That’s it.
No eggs, no fancy ingredients. Keep a pinch of salt handy if your butter is unsalted and you like a slightly brighter flavor, but it’s optional.
Instructions
- Line two baking sheets with parchment. Heat the oven to 350°F (175°C).
This recipe makes about 22–24 cookies.
- In a mixing bowl, beat the butter and cream cheese with a hand mixer until smooth and creamy, about 1–2 minutes. Scrape down the bowl.
- Add the sugar and beat until light and slightly fluffy, another 1 minute. You want a soft, unified mixture.
- Add the flour and mix on low just until the dough comes together.
Stop as soon as you see no dry streaks. The dough should feel soft but not sticky.
- Cover and chill the dough for 30 minutes. This quick rest keeps the cookies thick and helps prevent cracks.
- Scoop heaping teaspoon portions and roll into smooth 1-inch balls.
Space them about 2 inches apart on the baking sheets.
- Use your thumb or the back of a 1/2-teaspoon measure to press a gentle well in the center of each ball. Don’t press all the way through.
- Fill each well with 1/2 teaspoon raspberry jam. Don’t overfill; the jam will spread a little in the oven.
- Bake one sheet at a time for 11–13 minutes, until the edges look set and the bottoms show a light golden ring.
The tops should stay pale.
- If the centers puffed, press the wells lightly again right after baking with the spoon measure. Let the cookies cool on the sheet for 5 minutes, then move them to a rack to cool completely.
Keeping It Fresh
These cookies keep their best texture for 2–3 days at room temperature in an airtight container. Place parchment between layers so the jam centers don’t stick.
For longer storage, refrigerate them for up to 5 days.
Let them come to room temp before serving so the texture softens and the flavors open up.
You can also freeze baked cookies for 2–3 months. Freeze on a tray until firm, then bag them with air pressed out. Thaw at room temp.
If you like to plan ahead, freeze the unbaked dough balls and thumbprint them right before baking. Add jam frozen or after a 5-minute chill.
Benefits of This Recipe
- Only five ingredients, all easy to find.
- No eggs, which helps if you’re baking for egg-free friends.
- Fast mixing and a short chill, so you can bake same-day without stress.
- Pretty presentation with very little effort.
- Flexible flavor—swap the jam to match the season or your mood.
- Freezer-friendly for make-ahead baking.
What Not to Do
- Don’t skip the chill. Warm dough spreads and loses the well shape.
- Don’t overfill the jam. Extra jam will bubble over and make sticky sides.
- Don’t overbake. Look for set edges and pale tops. Overbaking dries them out fast.
- Don’t use runny jam. Choose a thicker jam or preserves so the center sets nicely.
- Don’t pack the flour. Fluff, spoon, and level, or weigh it, or the cookies will turn dense.
Alternatives
- Swap the jam: Strawberry, blackberry, blueberry, apricot, or cherry all work.
Choose a thicker style for the cleanest look.
- Lemon twist: Use lemon curd for a sunny, tart center. Chill it well so it doesn’t run.
- Chocolate moment: After baking, add a small dab of chocolate-hazelnut spread to the cooled wells instead of jam.
- Gluten-free: Use a 1:1 gluten-free all-purpose blend. Chill the dough a touch longer if it feels soft.
- Almond vibe (optional sixth ingredient): If you don’t mind going beyond five, add 1/2 teaspoon almond extract to the dough.
It pairs beautifully with raspberry.
FAQ
Can I use low-fat cream cheese?
Yes, but the dough will feel a bit softer and the cookies may spread more. Chill the dough a little longer and watch the bake time so they stay tender.
How do I keep the thumbprints from cracking?
Roll smooth balls, press the well gently, and chill the dough. If small cracks appear, nudge them back together with your fingers before baking.
A short chill after forming also helps.
Why did my cookies spread too much?
The dough was likely too warm or the flour was under-measured. Chill for at least 30 minutes and measure flour accurately. A thicker jam also helps the centers hold shape.
Can I make the dough ahead?
Yes.
Refrigerate the dough for up to 48 hours. Let it sit on the counter for 10–15 minutes until scoopable, then roll, fill, and bake as directed.
Do I put the jam in before or after baking?
Add the jam before baking. It sets as the cookies bake and gives a glossy finish.
If the centers sink, you can add a tiny extra dab after baking to top them off.
Can I use frozen raspberries instead of jam?
Not directly. They release too much liquid and will weep. If you want to use frozen fruit, cook it with a little sugar to make a quick, thick jam and cool it before filling.
How will I know they’re done?
Look for set edges and a light golden ring on the bottom.
The tops should stay pale and soft. They continue to firm up as they cool.
Can I double the recipe?
Absolutely. Double everything and bake in batches.
Keep the unbaked sheet of formed cookies in the fridge while the first batch bakes.
Final Thoughts
These 5-Ingredient Raspberry Cheesecake Thumbprint Cookies bring big flavor with very little effort. They’re soft, rich, and bright—perfect for sharing or keeping on hand for a quick treat. Once you try the basic version, swap the filling and make them your own.
Simple, pretty, and reliable, they’re the kind of cookie you’ll bake again and again.
5-Ingredient Raspberry Cheesecake Thumbprint Cookies - Soft, Buttery, and Bright
Ingredients
- 1/2 cup (113 g) unsalted butter, softened – room temp so it creams smoothly.
- 4 oz (113 g) cream cheese, softened – full-fat gives the best texture and flavor.
- 1/2 cup (100 g) granulated sugar – for sweetness and light structure.
- 1 1/4 cups (160 g) all-purpose flour – measured correctly for the right tenderness.
- 1/3 to 1/2 cup raspberry jam or preserves – seedless if you prefer a smooth bite.
Method
- Line two baking sheets with parchment. Heat the oven to 350°F (175°C). This recipe makes about 22–24 cookies.
- In a mixing bowl, beat the butter and cream cheese with a hand mixer until smooth and creamy, about 1–2 minutes. Scrape down the bowl.
- Add the sugar and beat until light and slightly fluffy, another 1 minute. You want a soft, unified mixture.
- Add the flour and mix on low just until the dough comes together. Stop as soon as you see no dry streaks. The dough should feel soft but not sticky.
- Cover and chill the dough for 30 minutes. This quick rest keeps the cookies thick and helps prevent cracks.
- Scoop heaping teaspoon portions and roll into smooth 1-inch balls. Space them about 2 inches apart on the baking sheets.
- Use your thumb or the back of a 1/2-teaspoon measure to press a gentle well in the center of each ball. Don’t press all the way through.
- Fill each well with 1/2 teaspoon raspberry jam. Don’t overfill; the jam will spread a little in the oven.
- Bake one sheet at a time for 11–13 minutes, until the edges look set and the bottoms show a light golden ring. The tops should stay pale.
- If the centers puffed, press the wells lightly again right after baking with the spoon measure. Let the cookies cool on the sheet for 5 minutes, then move them to a rack to cool completely.
Let us know how it was! ♡