Candy Cane Cookies – A Festive, Buttery Holiday Favorite

Candy cane cookies bring instant holiday cheer with their red-and-white twists and buttery vanilla-mint flavor. They’re the kind of cookie that looks impressive on a platter but is surprisingly simple to make at home. The dough is soft, easy to shape, and bakes into tender cookies with crisp edges.
Whether you’re baking for a cookie swap, Santa’s plate, or a cozy afternoon treat, these cookies deliver pure nostalgia. And yes, they taste as good as they look.

What Makes This Special
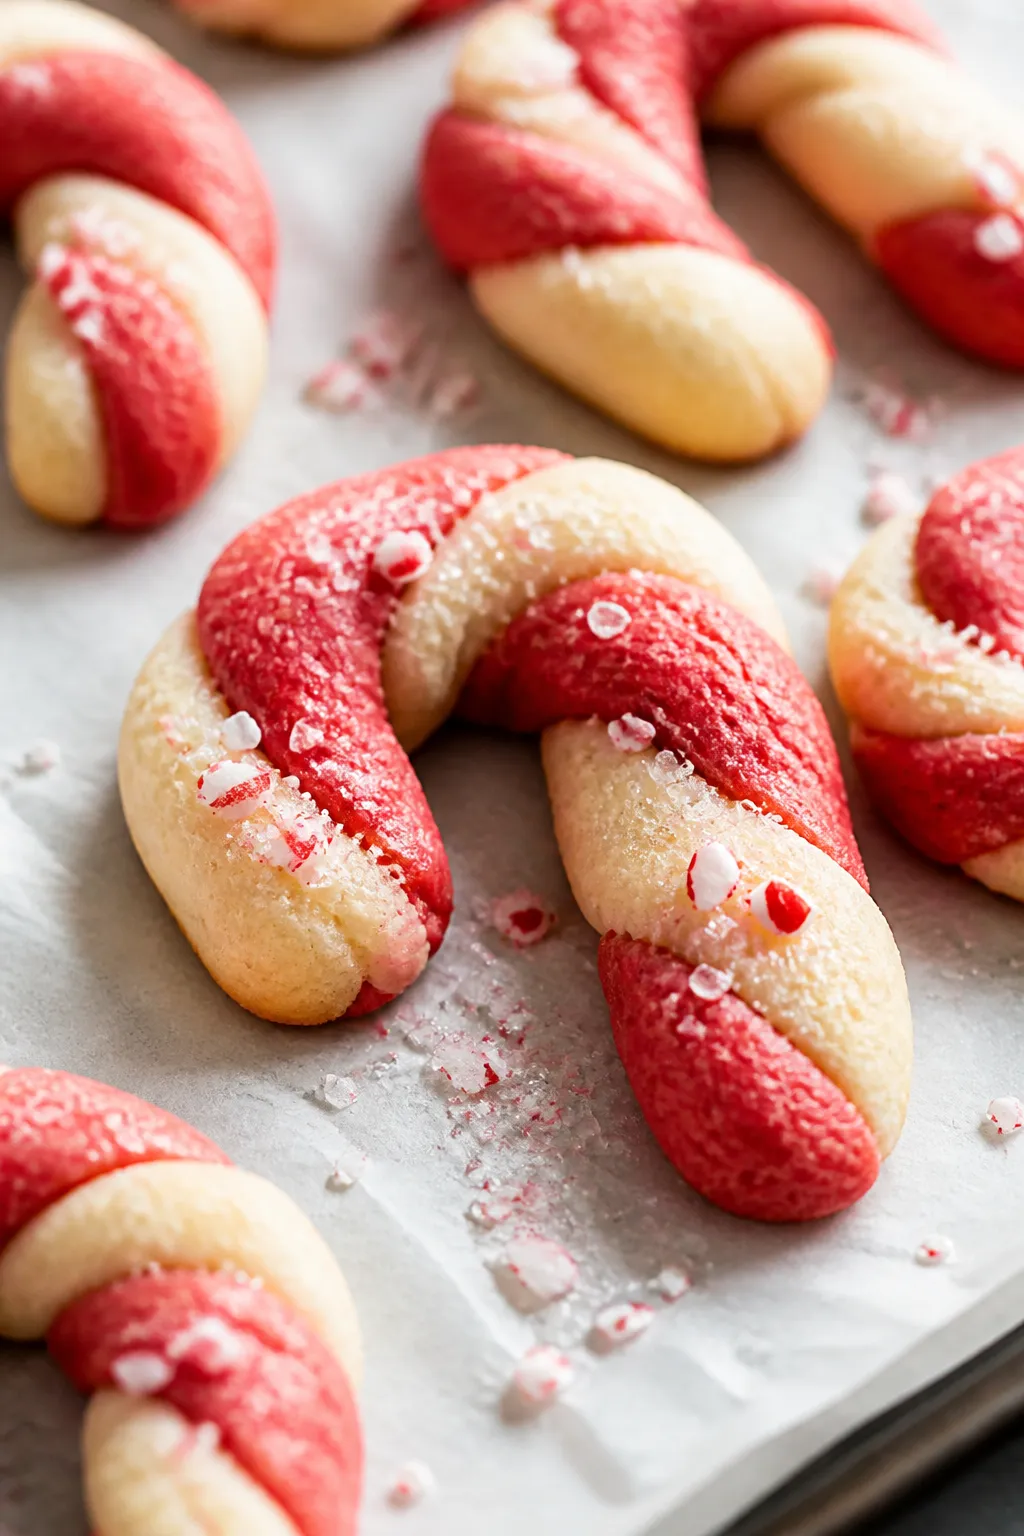
These candy cane cookies balance buttery richness with a light peppermint finish, so they’re festive without being overpowering. The dough splits into two colors, making that classic twist easy to achieve.
No fancy tools required—just your hands and a baking sheet. They also hold their shape well, so your candy canes look neat after baking. Best of all, they freeze beautifully, so you can make them ahead and bake when you’re ready.
Shopping List
- Unsalted butter (1 cup, softened)
- Granulated sugar (1 cup)
- Large eggs (2)
- Vanilla extract (1.5 teaspoons)
- Peppermint extract (1/2 teaspoon; adjust to taste)
- All-purpose flour (3 cups)
- Baking powder (1 teaspoon)
- Salt (1/2 teaspoon)
- Red gel food coloring (or liquid, but gel gives stronger color)
- Optional garnish: crushed candy canes or sanding sugar
How to Make It

- Preheat and prep: Set the oven to 350°F (175°C).
Line two baking sheets with parchment paper or silicone mats. This prevents sticking and helps the cookies keep their shape.
- Cream the butter and sugar: In a large bowl, beat softened butter and sugar on medium speed until light and fluffy, about 2–3 minutes. This step traps air for tender cookies.
- Add eggs and flavor: Beat in the eggs one at a time.
Mix in vanilla and peppermint extracts. Scrape the bowl so everything blends evenly.
- Mix dry ingredients: In a separate bowl, whisk flour, baking powder, and salt. Add dry ingredients to the butter mixture in two additions, mixing on low just until combined.
Do not overmix.
- Divide and color the dough: Split the dough in half. Leave one half plain. Add red gel food coloring to the other half and knead gently until evenly colored.
Use gloves to avoid staining your hands.
- Chill briefly: Wrap each dough half in plastic and chill for 20–30 minutes. Chilled dough is easier to roll and twist without breaking.
- Roll ropes: Pinch off a tablespoon-sized piece from each dough color. Roll each into a rope about 5–6 inches long on a lightly floured surface.
Keep the ropes even for neat twists.
- Twist and shape: Lay one red rope and one plain rope side by side. Gently twist together, then bend the top to form a candy cane hook. Transfer carefully to the baking sheet, spacing about 2 inches apart.
- Optional topping: Sprinkle a little crushed candy cane or sanding sugar on top.
Press lightly so it adheres.
- Bake: Bake 8–10 minutes, until the edges look set and the bottoms are just starting to turn golden. Do not brown the tops—you want them soft with crisp edges.
- Cool: Let cookies cool on the sheet for 5 minutes to firm up, then move to a wire rack. They’re delicate when hot but sturdy once cooled.
- Repeat: Keep rolling, twisting, and baking with remaining dough.
If dough softens, pop it back in the fridge for a few minutes.
How to Store
Store cooled cookies in an airtight container at room temperature for up to 5 days. To freeze baked cookies, layer them with parchment in a freezer-safe container for up to 2 months. Thaw at room temperature.
For make-ahead ease, freeze the shaped, unbaked candy canes on a tray until solid, then bag them. Bake from frozen, adding 1–2 minutes to the time.
Benefits of This Recipe
- Holiday-ready look: The classic red-and-white twist adds instant charm to any cookie tray.
- Beginner-friendly: Simple ingredients and straightforward steps make this easy for all skill levels.
- Customizable flavor: Adjust the peppermint level or swap for almond extract if you prefer.
- Great texture: Buttery, tender centers with lightly crisp edges.
- Make-ahead friendly: Dough chills well and the cookies freeze beautifully.
Common Mistakes to Avoid
- Overmixing the dough: This can make cookies tough. Mix just until the flour disappears.
- Skipping the chill: Warm dough is sticky and hard to shape.
A short chill makes shaping easy and prevents spreading.
- Using too much food coloring: A little gel color goes a long way. Start small and add more if needed.
- Overbaking: Brown tops mean dry cookies. Pull them when edges set and bottoms lightly color.
- Uneven ropes: Different thicknesses bake unevenly and look lopsided.
Aim for uniform length and width.
Recipe Variations
- Almond Candy Canes: Replace peppermint with 1 teaspoon almond extract. The nutty aroma pairs well with the buttery dough.
- Chocolate Drizzle: Once cooled, drizzle with melted dark or white chocolate for a decorative finish.
- Sugar-Coated Sparkle: Roll twisted dough lightly in coarse sanding sugar before baking for extra crunch and shine.
- Mint Crunch: Press finely crushed peppermint candies onto the surface before baking for a bolder mint bite.
- Gluten-Free Swap: Use a 1:1 gluten-free all-purpose flour blend with xanthan gum. Chill a bit longer to help with shaping.
- Color Play: Try green instead of red for a fresh twist, or make tri-color ropes for a more playful look.
FAQ
Can I make the dough ahead of time?
Yes.
Wrap each dough color tightly and refrigerate for up to 48 hours. If it firms up too much, let it sit at room temperature for 10–15 minutes before rolling.
What if I don’t have peppermint extract?
You can skip it and rely on vanilla for a classic butter cookie flavor. Or swap in almond, orange, or lemon extract for a different holiday vibe.
How do I keep the twists from coming apart?
Roll ropes to similar thickness and gently press them together before twisting.
A light pinch at both ends helps. If dough is too soft, chill briefly to make it more workable.
Why did my cookies spread too much?
The dough was likely too warm or the butter too soft. Chill the shaped cookies on the tray for 10 minutes before baking, and be sure your oven is fully preheated.
Can I double the recipe?
Absolutely.
Use a large mixing bowl and scrape the sides often to ensure even mixing. You may need to chill in batches to keep the dough easy to handle.
What’s the best food coloring to use?
Gel food coloring gives a strong, vibrant red without thinning the dough. If using liquid coloring, add sparingly and consider adding a teaspoon or two of extra flour if the dough becomes sticky.
How do I keep them soft after baking?
Avoid overbaking, and store in an airtight container once fully cool.
You can add a slice of bread to the container to help maintain moisture, replacing it as it dries out.
Can kids help with this recipe?
Yes, it’s a great family project. Kids can roll ropes, twist them, and add sprinkles. Just supervise around the oven and when handling sharp candy pieces.
In Conclusion
Candy cane cookies are festive, fun, and easier than they look.
With a buttery base and a touch of peppermint, they taste like the holidays in every bite. Chill the dough, keep the twists even, and pull them from the oven before they brown. Make a batch for your next gathering, and watch them disappear fast—these are the cookies everyone reaches for first.
Candy Cane Cookies - A Festive, Buttery Holiday Favorite
Ingredients
- Unsalted butter (1 cup, softened)
- Granulated sugar (1 cup)
- Large eggs (2)
- Vanilla extract (1.5 teaspoons)
- Peppermint extract (1/2 teaspoon; adjust to taste)
- All-purpose flour (3 cups)
- Baking powder (1 teaspoon)
- Salt (1/2 teaspoon)
- Red gel food coloring (or liquid, but gel gives stronger color)
- Optional garnish: crushed candy canes or sanding sugar
Method
- Preheat and prep: Set the oven to 350°F (175°C). Line two baking sheets with parchment paper or silicone mats. This prevents sticking and helps the cookies keep their shape.
- Cream the butter and sugar: In a large bowl, beat softened butter and sugar on medium speed until light and fluffy, about 2–3 minutes. This step traps air for tender cookies.
- Add eggs and flavor: Beat in the eggs one at a time. Mix in vanilla and peppermint extracts. Scrape the bowl so everything blends evenly.
- Mix dry ingredients: In a separate bowl, whisk flour, baking powder, and salt. Add dry ingredients to the butter mixture in two additions, mixing on low just until combined. Do not overmix.
- Divide and color the dough: Split the dough in half. Leave one half plain. Add red gel food coloring to the other half and knead gently until evenly colored. Use gloves to avoid staining your hands.
- Chill briefly: Wrap each dough half in plastic and chill for 20–30 minutes. Chilled dough is easier to roll and twist without breaking.
- Roll ropes: Pinch off a tablespoon-sized piece from each dough color. Roll each into a rope about 5–6 inches long on a lightly floured surface. Keep the ropes even for neat twists.
- Twist and shape: Lay one red rope and one plain rope side by side. Gently twist together, then bend the top to form a candy cane hook. Transfer carefully to the baking sheet, spacing about 2 inches apart.
- Optional topping: Sprinkle a little crushed candy cane or sanding sugar on top. Press lightly so it adheres.
- Bake: Bake 8–10 minutes, until the edges look set and the bottoms are just starting to turn golden. Do not brown the tops—you want them soft with crisp edges.
- Cool: Let cookies cool on the sheet for 5 minutes to firm up, then move to a wire rack. They’re delicate when hot but sturdy once cooled.
- Repeat: Keep rolling, twisting, and baking with remaining dough. If dough softens, pop it back in the fridge for a few minutes.
Let us know how it was! ♡