Candy Cane Sugar Cookies – Festive, Buttery, and Fun to Make
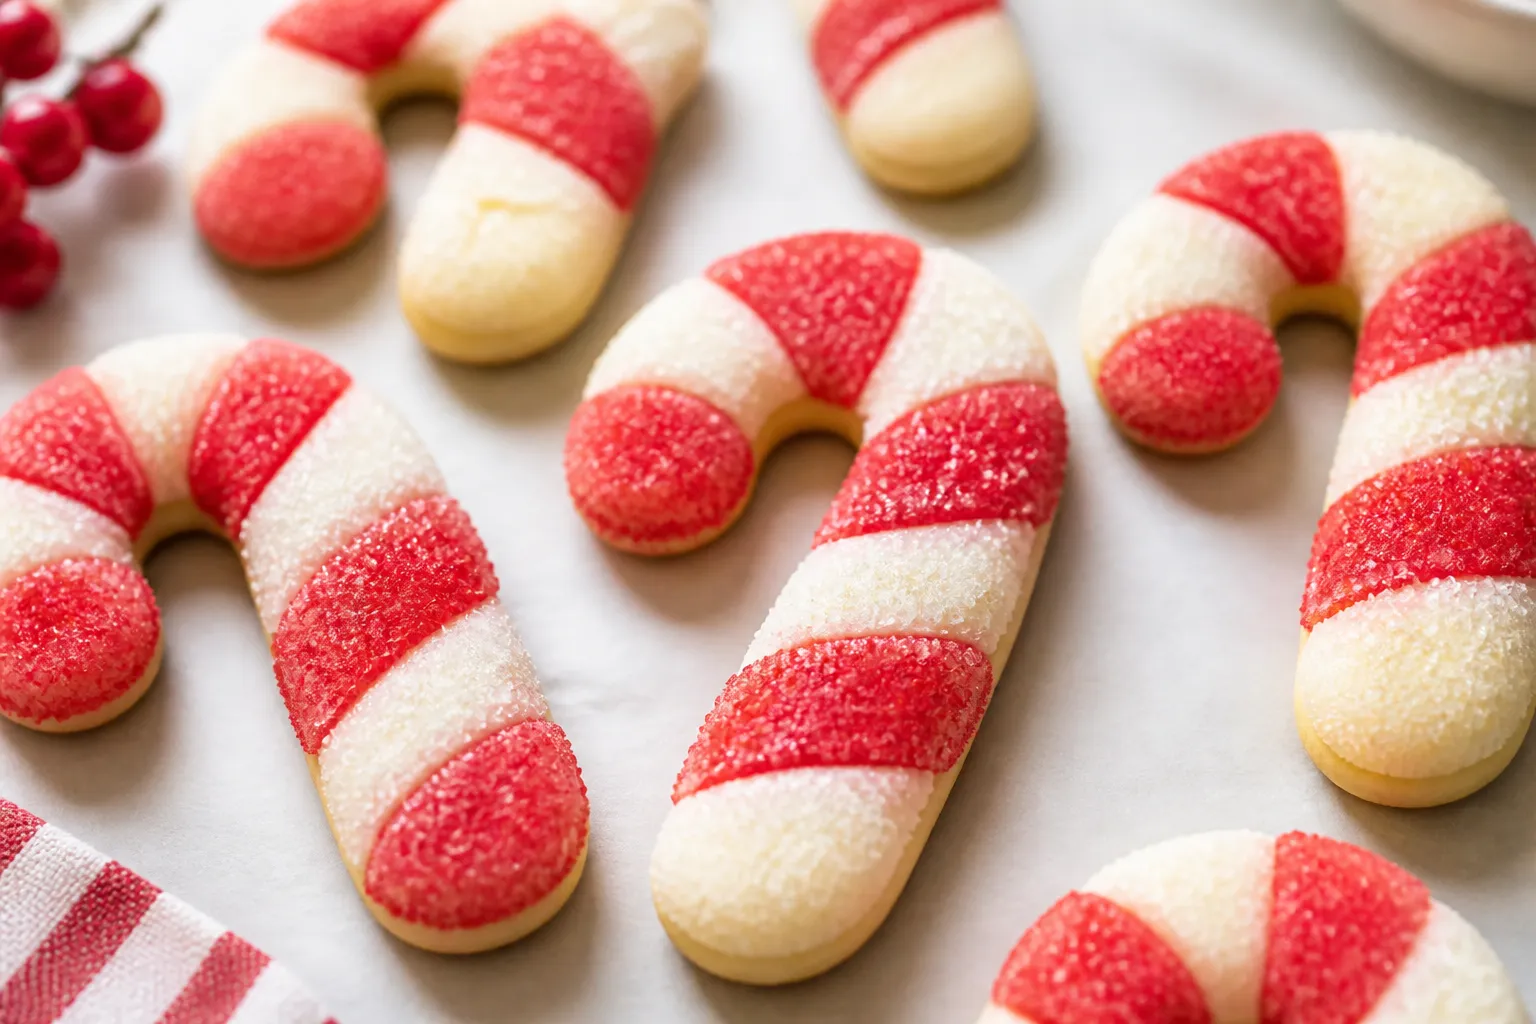
These candy cane sugar cookies bring all the holiday cheer without any fuss. They’re buttery, soft in the center, and shaped like the classic red-and-white canes you grew up with. The dough is easy to handle, the colors are bright, and the peppermint notes are just right.
Whether you’re baking with kids or making a pretty cookie box, these are the kind that disappear fast. Keep a few for yourself—you’ll want them with hot cocoa or coffee.
What Makes This Special

These cookies look impressive but come together with simple pantry ingredients. The dough holds its shape, so your candy canes keep their twist and don’t melt into blobs.
A touch of peppermint extract makes them festive without tasting like toothpaste. And because the dough chills well, you can make it ahead, then bake when you’re ready. It’s a great balance of flavor, texture, and holiday style.
Shopping List
- All-purpose flour – for structure
- Baking powder – gentle lift
- Kosher salt – balances sweetness
- Unsalted butter – room temperature
- Granulated sugar – classic sweetness
- Large eggs – bind the dough
- Vanilla extract – warm flavor base
- Peppermint extract – for the candy cane vibe
- Red gel food coloring – bold color without thinning the dough
- Milk or heavy cream (optional) – for a softer crumb
- Crushed candy canes or peppermint candies (optional) – for topping
- Coarse sanding sugar (optional) – sparkle and crunch
Instructions

- Prep your space: Line two baking sheets with parchment.
Set the oven to 350°F (175°C), but you’ll preheat later after chilling the dough.
- Mix dry ingredients: In a bowl, whisk 3 cups all-purpose flour, 1 teaspoon baking powder, and 1/2 teaspoon kosher salt. Set aside.
- Cream butter and sugar: In a large bowl, beat 1 cup unsalted butter with 1 cup granulated sugar on medium speed until light and fluffy, 2–3 minutes. This traps air and creates tender cookies.
- Add eggs and flavor: Beat in 1 large egg until fully combined.
Mix in 1 1/2 teaspoons vanilla extract and 1/2 teaspoon peppermint extract. If you like a softer cookie, add 1 tablespoon milk or cream.
- Combine wet and dry: Add the dry ingredients in two additions, mixing on low just until a soft dough forms. Don’t overmix.
- Divide and color: Split the dough in half.
Leave one half plain. To the other half, add red gel food coloring a little at a time until you get a vivid red. Knead gently with a spatula or by hand to distribute color evenly.
- Chill: Shape each dough half into a flat disk, wrap tightly, and chill for 45–60 minutes.
Chilled dough is easier to roll and holds its shape while baking.
- Preheat oven: Now set the oven to 350°F (175°C).
- Shape ropes: Pinch off 1 tablespoon of plain dough and 1 tablespoon of red dough. Roll each into a rope about 6 inches long. If dough cracks, warm it in your hands for a few seconds.
- Twist into canes: Place the ropes side by side and gently twist them together.
Transfer to the prepared sheet and curve the top into a cane hook. Repeat, spacing cookies about 2 inches apart.
- Add sparkle (optional): Lightly brush with milk and sprinkle with coarse sugar or a bit of crushed candy cane for crunch and shine.
- Bake: Bake 9–11 minutes, until the edges look set and bottoms are just turning light golden. The tops should remain pale for a soft texture.
- Cool: Let the cookies rest on the sheet for 5 minutes, then move to a rack to cool completely.
They firm up as they cool.
- Repeat: Continue with remaining dough, keeping unused dough in the fridge so it stays easy to shape.
How to Store
Store cooled cookies in an airtight container at room temperature for up to 5 days. Layer with parchment to protect the twists. For longer storage, freeze baked cookies for up to 2 months; thaw at room temperature.
You can also freeze the shaped, unbaked canes on a tray, then bag them and bake from frozen, adding 1–2 minutes to the bake time.
Benefits of This Recipe
- Kid-friendly project: Rolling ropes and twisting colors is hands-on and fun for little helpers.
- Make-ahead friendly: The dough chills well and can be prepped days in advance.
- Balanced flavor: Vanilla softens the peppermint, so the taste is festive without being overpowering.
- Pretty presentation: The red-and-white twist looks great on cookie trays and makes an easy gift.
- Reliable texture: Soft centers with lightly crisp edges keep everyone happy.
Common Mistakes to Avoid
- Over-coloring the dough: Too much liquid dye makes dough sticky. Use gel color and add it slowly.
- Skipping the chill: Warm dough spreads and loses definition. Chill for at least 45 minutes.
- Overbaking: Pale tops are okay.
Pull them when edges set; they continue to firm as they cool.
- Heavy hand with peppermint: More than 1/2 teaspoon can taste harsh. Keep it measured and balanced with vanilla.
- Uneven ropes: Different thicknesses bake at different speeds. Aim for uniform 6-inch ropes for even results.
Variations You Can Try
- Almond twist: Swap peppermint for 1/2 teaspoon almond extract and add a few drops of almond to the red dough only for a subtle layered flavor.
- Chocolate-dipped ends: Dip the straight tips in melted dark or white chocolate and sprinkle with crushed candy cane.
- Gluten-free version: Use a 1:1 gluten-free baking flour with xanthan gum.
Chill a bit longer for easier shaping.
- Sparkle sugar finish: Roll the ropes lightly in sanding sugar before twisting for a frosted look.
- Citrus peppermint: Add 1 teaspoon finely grated orange zest to the plain dough for a bright twist against the mint.
FAQ
Can I make the dough ahead?
Yes. Wrap each color tightly and refrigerate for up to 3 days. If the dough feels too firm, let it sit at room temperature for 10–15 minutes before shaping.
What if I don’t have gel food coloring?
Liquid food coloring works, but add it sparingly and compensate with a teaspoon or two of extra flour if the dough gets sticky.
Gel is best for vibrant color without changing the texture.
How do I keep the colors from bleeding?
Chill the dough, avoid over-handling once twisted, and don’t brush with too much liquid. Bake on parchment and cool completely before stacking.
My cookies cracked while rolling—what should I do?
If the dough is too cold, it will crack. Warm it slightly in your hands or let it rest for a few minutes.
A tiny smear of milk can help smooth rough spots.
Can I use candy cane pieces inside the dough?
You can, but use them sparingly. Crushed candy canes can melt and create sticky spots. It’s safer to sprinkle them on top right after baking while the cookies are warm.
How many cookies does this make?
Shaped as 6-inch canes, the recipe yields about 24–28 cookies, depending on how thick you roll the ropes.
Can I make them without peppermint?
Absolutely.
Skip the peppermint and double the vanilla, or use almond extract for a classic bakery-style sugar cookie with a festive look.
Do I need to chill between batches?
Keep unused dough chilled while each tray bakes. If the dough softens, the canes may spread. A quick 10-minute chill fixes that.
How do I get perfectly even ropes?
Weigh the dough pieces for consistency, and roll from the center outward with your palms.
Lightly flour the surface, but not too much—you still need grip.
Can I freeze the dough?
Yes. Freeze the colored dough disks for up to 2 months. Thaw overnight in the fridge, then shape and bake as directed.
In Conclusion
Candy cane sugar cookies are cheerful, simple, and reliably delicious.
With a short chill and a quick twist, you get bakery-worthy treats that taste as good as they look. Keep the peppermint balanced, watch the bake time, and have fun with the colors and toppings. They’re just the kind of cookie that makes the season feel special—one batch at a time.
Ingredients
Method
- Prep your space: Line two baking sheets with parchment. Set the oven to 350°F (175°C), but you’ll preheat later after chilling the dough.
- Mix dry ingredients: In a bowl, whisk 3 cups all-purpose flour, 1 teaspoon baking powder, and 1/2 teaspoon kosher salt. Set aside.
- Cream butter and sugar: In a large bowl, beat 1 cup unsalted butter with 1 cup granulated sugar on medium speed until light and fluffy, 2–3 minutes. This traps air and creates tender cookies.
- Add eggs and flavor: Beat in 1 large egg until fully combined. Mix in 1 1/2 teaspoons vanilla extract and 1/2 teaspoon peppermint extract. If you like a softer cookie, add 1 tablespoon milk or cream.
- Combine wet and dry: Add the dry ingredients in two additions, mixing on low just until a soft dough forms. Don’t overmix.
- Divide and color: Split the dough in half. Leave one half plain. To the other half, add red gel food coloring a little at a time until you get a vivid red. Knead gently with a spatula or by hand to distribute color evenly.
- Chill: Shape each dough half into a flat disk, wrap tightly, and chill for 45–60 minutes. Chilled dough is easier to roll and holds its shape while baking.
- Preheat oven: Now set the oven to 350°F (175°C).
- Shape ropes: Pinch off 1 tablespoon of plain dough and 1 tablespoon of red dough. Roll each into a rope about 6 inches long. If dough cracks, warm it in your hands for a few seconds.
- Twist into canes: Place the ropes side by side and gently twist them together. Transfer to the prepared sheet and curve the top into a cane hook. Repeat, spacing cookies about 2 inches apart.
- Add sparkle (optional): Lightly brush with milk and sprinkle with coarse sugar or a bit of crushed candy cane for crunch and shine.
- Bake: Bake 9–11 minutes, until the edges look set and bottoms are just turning light golden. The tops should remain pale for a soft texture.
- Cool: Let the cookies rest on the sheet for 5 minutes, then move to a rack to cool completely. They firm up as they cool.
- Repeat: Continue with remaining dough, keeping unused dough in the fridge so it stays easy to shape.