Pops Recipes – Easy, Refreshing Treats You Can Make at Home
Pops are the kind of treat that make a hot day feel manageable and a regular afternoon feel a little festive. They’re quick to prep, endlessly customizable, and a fun project for both kids and adults. Whether you like bright fruit flavors, creamy swirls, or a little crunch, there’s a version that fits your mood.
Best of all, homemade pops let you control the sweetness and ingredients, so they taste fresh and feel better than store-bought.
What Makes This Special
Homemade pops shine because they’re simple and flexible. You don’t need fancy gear—just a blender and a mold or some paper cups with sticks. You can use peak-season fruit, pantry staples, or even leftover smoothie mix.
They’re budget-friendly, quick to assemble, and easy to scale for a crowd. They also double as a clever way to reduce food waste. That bag of slightly soft berries?
Perfect. The last cup of yogurt? Ideal base for creamy pops.
With a few smart tricks, you can get clean layers, smooth textures, and flavors that pop—pun intended.
Shopping List
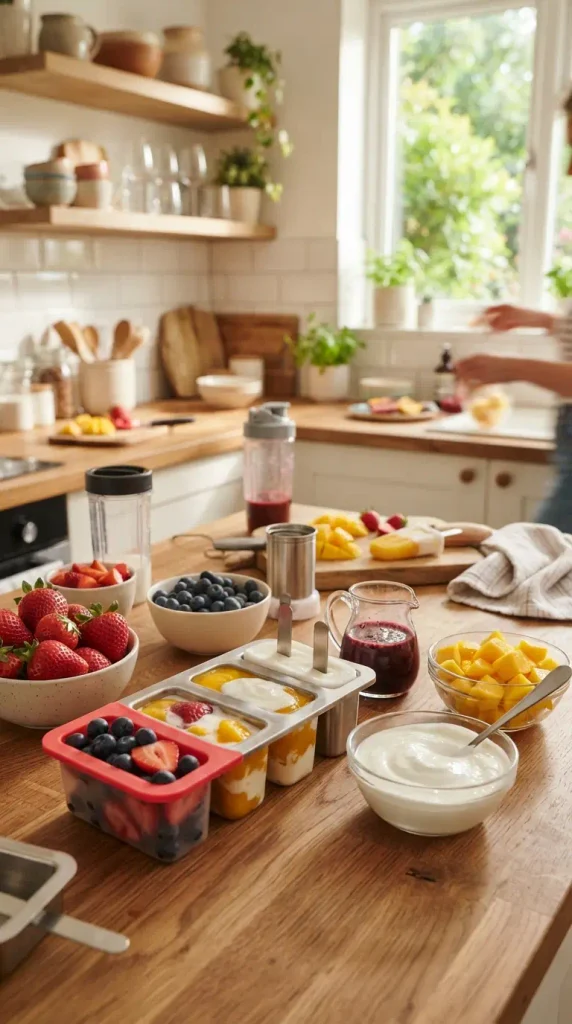
- Fruit: Strawberries, mangoes, peaches, blueberries, pineapple, or mixed frozen fruit
- Citrus: Lemons or limes for brightness
- Sweetener: Honey, maple syrup, agave, or simple syrup
- Creamy Base (optional): Greek yogurt, coconut milk, whole milk, or oat milk
- Flavor Boosters: Vanilla extract, fresh mint, basil, cinnamon, or ginger
- Add-ins: Chia seeds, shredded coconut, mini chocolate chips, crushed cookies, or granola
- Hydrating Base (for lighter pops): Coconut water or 100% fruit juice
- Tools: Popsicle molds (or small paper cups), sticks, blender, and a fine-mesh strainer (optional)
How to Make It
- Pick your path: Decide between fruit-forward (lighter, icy) or creamy (richer, smooth). You can also do half-and-half or layered.
- Blend the base: For fruit pops, blend 3 cups fruit with 1/2–3/4 cup coconut water or juice, 1–3 tablespoons sweetener, and a squeeze of lemon or lime. For creamy pops, blend 2 cups yogurt or coconut milk with 1–2 cups fruit and 1–3 tablespoons sweetener plus 1 teaspoon vanilla.
- Taste and adjust: Fruit dulls a bit when frozen. Make it slightly sweeter and brighter than you think.
Add another squeeze of citrus or a touch more honey if needed.
- Strain if needed: If you want ultra-smooth pops, strain berry seeds or fibrous fruit through a fine-mesh sieve. This is optional but great for kids.
- Add texture: Stir in 1–2 tablespoons of chia seeds, shredded coconut, or finely chopped fruit. Keep pieces small so sticks stay put and pops don’t break.
- Layer for looks: For stripes, pour one flavor a third of the way, freeze 20–30 minutes, then add the next layer. Partially set layers prevent bleeding.
- Pour and insert sticks: Fill molds, leaving a little headspace. If your mold doesn’t hold sticks in place, freeze 30–45 minutes until slushy, then add sticks so they stand straight.
- Freeze fully: Freeze 4–6 hours or overnight until solid. Do not rush this step or pops may crack when unmolding.
- Unmold gently: Run warm water over the outside of the mold for 10–20 seconds, then wiggle sticks to release.
Avoid hot water—it can melt edges unevenly.
- Finish and enjoy: Eat right away or place on a parchment-lined tray and refreeze 15 minutes to firm before storing.
How to Store
- Short term: Keep pops in the mold for up to 1 week.
- Long term: Unmold, place on a parchment-lined tray to harden, then wrap each pop tightly in plastic wrap or wax paper and store in a freezer bag for up to 2 months.
- Prevent freezer burn: Squeeze out extra air from bags and keep pops toward the back of the freezer, away from the door.
Health Benefits
- Whole fruit fiber: Blended fruit supplies fiber, which supports digestion and helps keep you full compared to juice-only pops.
- Lower added sugar: You control sweetness. Using ripe fruit, a splash of citrus, and a touch of honey keeps sugars reasonable.
- Hydration: Bases like coconut water and high-water fruits (watermelon, strawberries) help with fluid intake on hot days.
- Protein and healthy fats: Greek yogurt adds protein; coconut milk adds satisfying fats, which slow sugar absorption and keep energy steady.
- Vitamins and antioxidants: Berries, mango, and pineapple bring vitamin C, carotenoids, and polyphenols that support immune health.
Pitfalls to Watch Out For
- Not sweet enough: Freezing mutes sweetness. Taste and slightly oversweeten the mixture before freezing.
- Icy texture: Too much water can make pops hard.
Add a little banana, yogurt, or a spoon of honey to improve softness.
- Sticks falling out: If you add heavy chunks, they can sink. Keep pieces small and insert sticks when the mixture is slushy.
- Separation: Juice and fruit pulp may separate in the mold. Blend well and let the mixture rest 2–3 minutes before pouring to reduce bubbles.
- Layers blending: Don’t pour a warm layer over a frozen one.
Chill mixtures in the fridge so layers set cleanly.
Recipe Variations
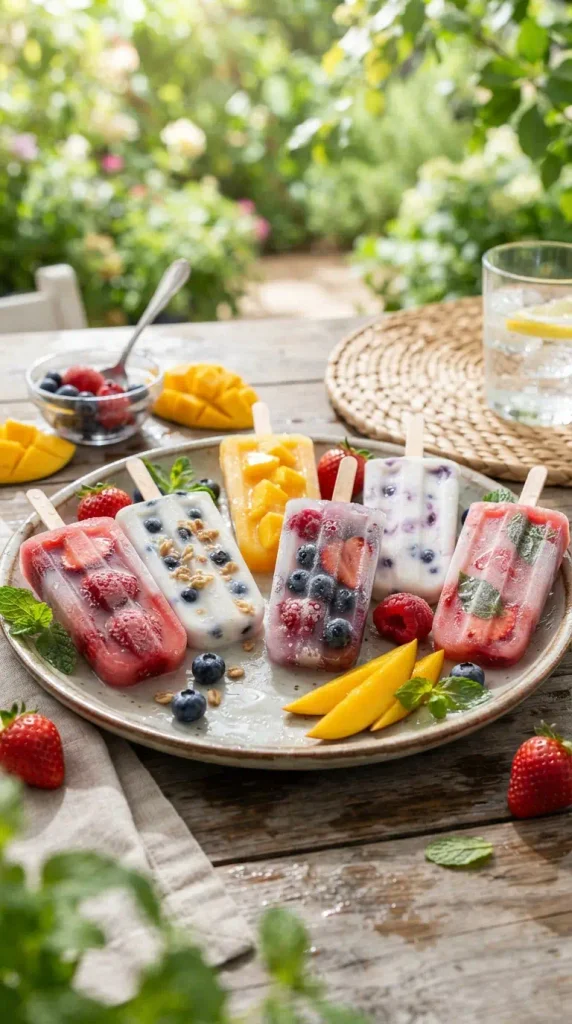
- Strawberry Lemonade Pops: Blend strawberries, lemon juice, and a touch of honey. Add a few thin lemon slices to the molds for a pretty look.
- Mango Coconut Swirl: Puree mango with lime, and separately mix coconut milk with vanilla and honey. Layer or swirl with a skewer.
- Peach Yogurt Crunch: Blend peaches with Greek yogurt and vanilla.
Stir in a spoon of granola just before pouring for texture.
- Berry Beet Boost: Strawberries, raspberries, a small cooked beet, and orange juice. Sweet, vibrant color, and an earthy note that kids barely notice.
- Chocolate Banana Fudge: Blend ripe banana, cocoa powder, milk of choice, a dash of peanut butter, and a drizzle of maple syrup.
- Watermelon Mint: Puree watermelon with lime and a few mint leaves. Strain for a clean, seed-free finish.
- Tropical Green: Pineapple, mango, spinach, coconut water, and ginger.
Bright, lightly sweet, and sneakily nutritious.
- Cookies and Cream (lighter): Greek yogurt, a splash of milk, vanilla, and a few crushed chocolate sandwich cookies folded in.
FAQ
Do I need a popsicle mold?
You can use small paper cups or silicone muffin cups. Cover with foil, poke a slit, and insert sticks. They release easily with a quick warm-water rinse.
How do I make pops less icy and more creamy?
Add a creamy component like yogurt, coconut milk, or a bit of ripe banana.
A spoonful of honey or maple syrup also helps, since sugars lower the freezing point and soften texture.
Can I use frozen fruit?
Yes. Thaw slightly so it blends smoothly, or add a splash more liquid. Frozen fruit is often picked ripe, so flavor stays strong.
What’s the right sweetness level?
Aim for a mixture that tastes a touch sweeter than you’d drink.
Freezing dulls sweetness by about 20–30%, so compensate before pouring.
How long do pops take to freeze?
Most molds need 4–6 hours, but overnight is most reliable. Larger molds or creamy mixes may take longer.
How do I keep layers neat?
Freeze each layer 20–30 minutes until just set, then add the next layer. Use chilled mixtures so they don’t melt into each other.
Can I make them dairy-free?
Absolutely.
Use coconut milk, almond milk, or oat milk. Coconut milk gives the creamiest, most dessert-like texture.
Any tips for adding alcohol for adult pops?
Keep it light—no more than 1 tablespoon alcohol per cup of mixture. Too much prevents freezing.
Mix with a creamy or sugary base for better structure.
How do I fit more fruit chunks without issues?
Chop very small and fold into a thicker base like yogurt or banana puree so pieces stay suspended and sticks hold firm.
What if I don’t have a blender?
Mash soft fruits (berries, bananas, peaches) with a fork and whisk with yogurt or juice. It won’t be ultra-smooth but still tastes great.
In Conclusion
Pops recipes are straightforward, flexible, and satisfying. With a few fruits, a creamy or hydrating base, and a touch of sweetness, you can make treats that feel special without much effort.
Mix, taste, freeze, and enjoy—then try a new variation next time. Once you get the hang of it, your freezer will always have a little burst of joy waiting.